Create Custom Tools for Superexpert.AI
The Superexpert.AI platform allows you to significantly enhance AI agent capabilities by creating custom tools. It not only abstracts the complexity of integrating with multiple LLM providers (such as OpenAI, Anthropic, and Google) by letting you write tools once and use them everywhere, but it also provides an easy-to-use API. Simply call intuitive register() methods to define your TypeScript functions without dealing with complex JSON schema definitions.
You can create three types of tools:
- Server Tools: Retrieve or manipulate server-side data.
- Client Tools: Execute actions directly in the user’s browser.
- Context Tools: Automatically executed with each user message to provide ongoing context.
Creating a Custom Server Tool
Server Tools are essential when your AI agent needs to perform server-side operations, such as making API calls, accessing databases, or processing data on the server. Common scenarios include fetching live weather data, retrieving customer order histories, or querying user profiles from a database.
The following example demonstrates how to create a Server Tool named getWeather to retrieve weather information:
Step 1: Open the Server Tools file
Locate and open the tools/server-tools.ts file.
Step 2: Register the Server Tool
Use the following TypeScript example to create a tool for fetching weather data:
registerServerTool({
    name: 'getWeather',
    description: 'Get the weather for the specified location',
    parameters: [
        {
            name: 'location',
            type: 'string',
            description: 'Location to get the weather',
        },
        {
            name: 'unit',
            type: 'string',
            description: 'Unit for temperature measurement',
            enum: ['celsius', 'fahrenheit'],
            required: false,
        },
    ],
    function(location: string, unit: 'celsius' | 'fahrenheit' = 'celsius') {
        const weatherData = {
            "london": "foggy",
            "la": "sunny",
            "seattle": "rainy",
            "austin": "hot",
            "helena": "snowy",
        };
        const weather = weatherData[location.toLowerCase() as keyof typeof weatherData] || "miserable";
        return `The weather in ${location} is ${weather} and the unit is ${unit}.`;
    },
});
Explanation:
When registering a Server Tool, you provide:
- name: A unique identifier for the tool.
- description: Helps the LLM determine when to invoke the tool.
- parameters: Clearly described inputs required by the tool.
- function: The server-side logic executed when the tool is invoked.
Accessing Additional Context:
Use JavaScript’s this keyword to access additional context, which includes:
export interface ServerToolContext {
  user: { id: string; now: Date; timeZone: string };
  agent: { id: string; name: string };
  db: PrismaClient;
}
You can access this context data within a function with JavaScript’s this like here:
function example() {
    const userId = this.user.id; // Easily access the current user id
    const agentName = this.agent.name;
    const database = this.db;
}
Tool Availability:
Your Server Tool appears in the Tools section of the Edit Task page. Adding the tool to the global task makes it available across all tasks.
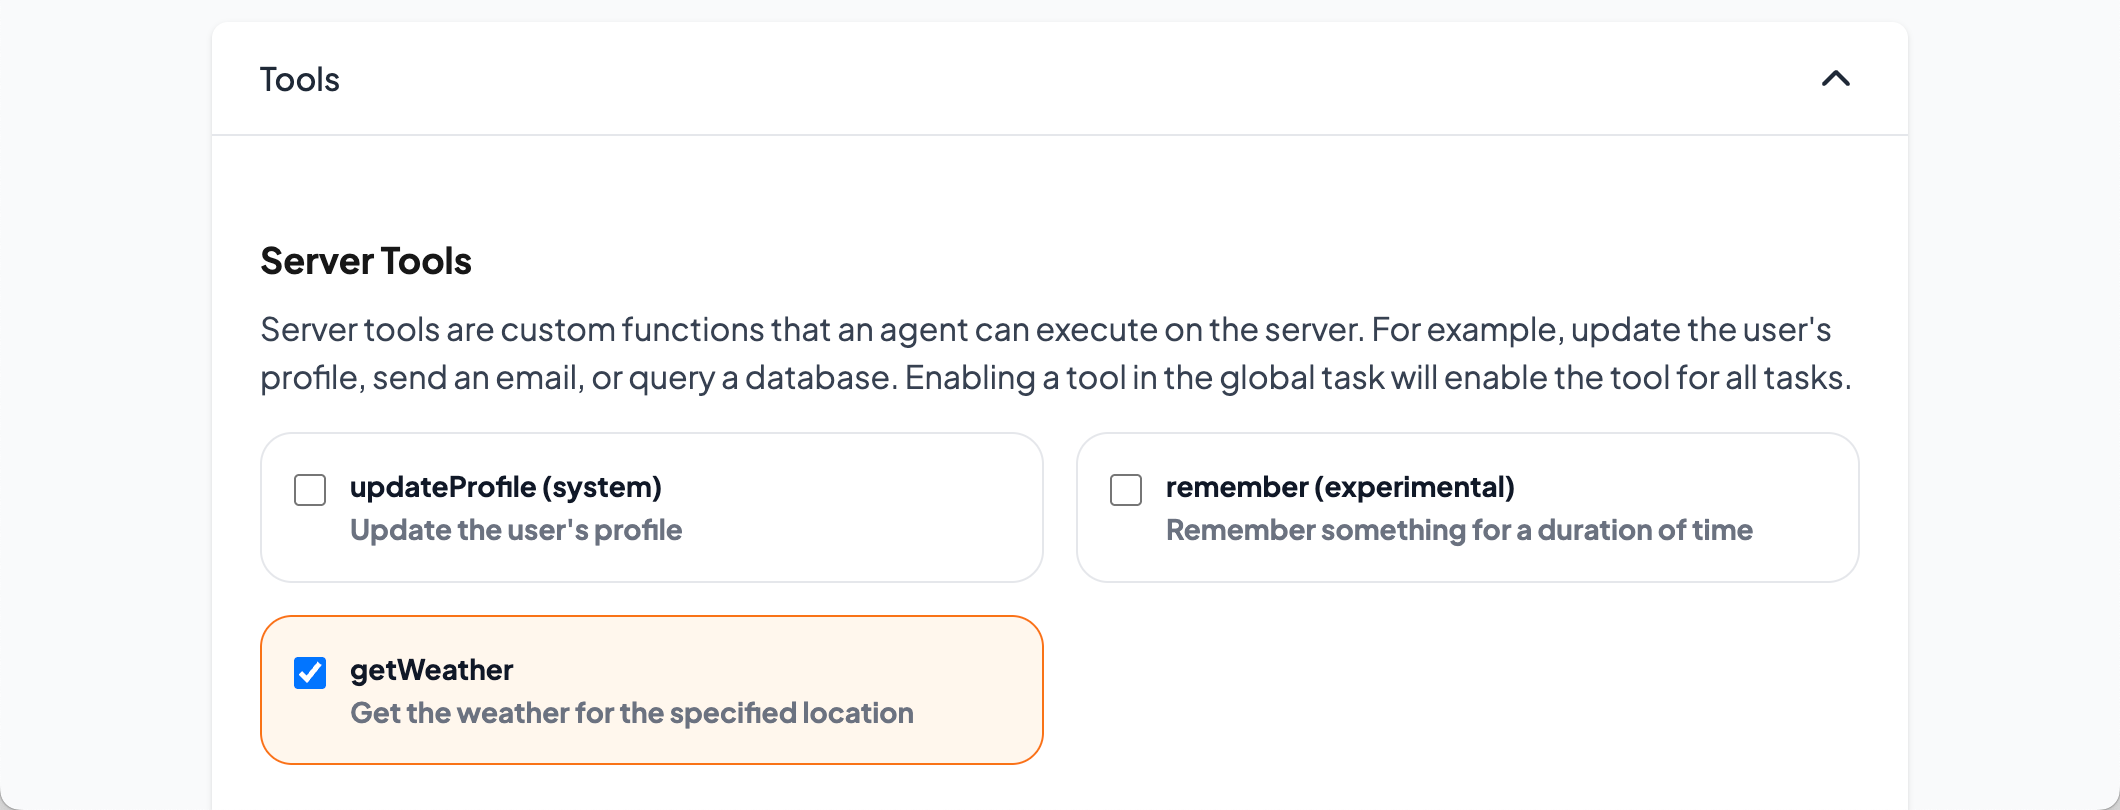 Figure 1: Enabling Server Tool.
Creating a Custom Client Tool
Client Tools are useful when you want your AI agent to interact directly with the user’s browser UI. Examples include displaying confirmation dialogs, updating the page dynamically, or prompting user interactions through modal dialogs.
The following example illustrates creating a Client Tool called showConfirmDialog to display a JavaScript confirm dialog:
Step 1: Open the Client Tools file
Navigate to tools/client-tools.ts.
Step 2: Register the Client Tool
Here’s how you can create a tool to display a standard confirm dialog:
registerClientTool({
    name: 'showConfirmDialog',
    description: 'Displays standard JavaScript confirm dialog',
    parameters: [
        {
            name: 'message',
            type: 'string',
            description: 'Message displayed in the dialog',
            default: 'Are you sure?',
        },
    ],
    async function(message: string) {
        const result = confirm(message);
        return `The user responded ${result}`;
    },
});
Explanation:
Registering a Client Tool involves specifying:
- name: A unique tool name.
- description: Clarifies when the tool should be triggered.
- parameters: Input parameters for the tool.
- function: Logic executed in the browser.
Accessing Additional Context:
Use JavaScript this to access additional context:
export class ClientToolContext {
    constructor(
        public tasks: ClientTaskDefinition[],
        public getCurrentTask: () => ClientTaskDefinition,
        public getTask: (taskName: string) => ClientTaskDefinition | null,
        public setTask: (taskName: string) => void,
        public getCurrentThread: () => string,
        public setThread: (id: string) => void,
        public sendMessages: (messages: MessageAI[]) => Promise<void>,
        public showModal: ShowModalType, // Ideal for showing modal dialogs, e.g., displaying a PDF
        public hideModal: () => void
    ) {}
}
You can access the context within a function with JavaScript’s this like here:
async function example() {
    const currentTask = this.getCurrentTask();
    const threadId = this.getCurrentThread();
    await this.sendMessages([{ role: 'user', content: 'Hello!' }]);
}
Tool Availability:
Your Client Tool will appear in the Tools section of the Edit Task page. Enabling it in the global task ensures availability in all tasks.
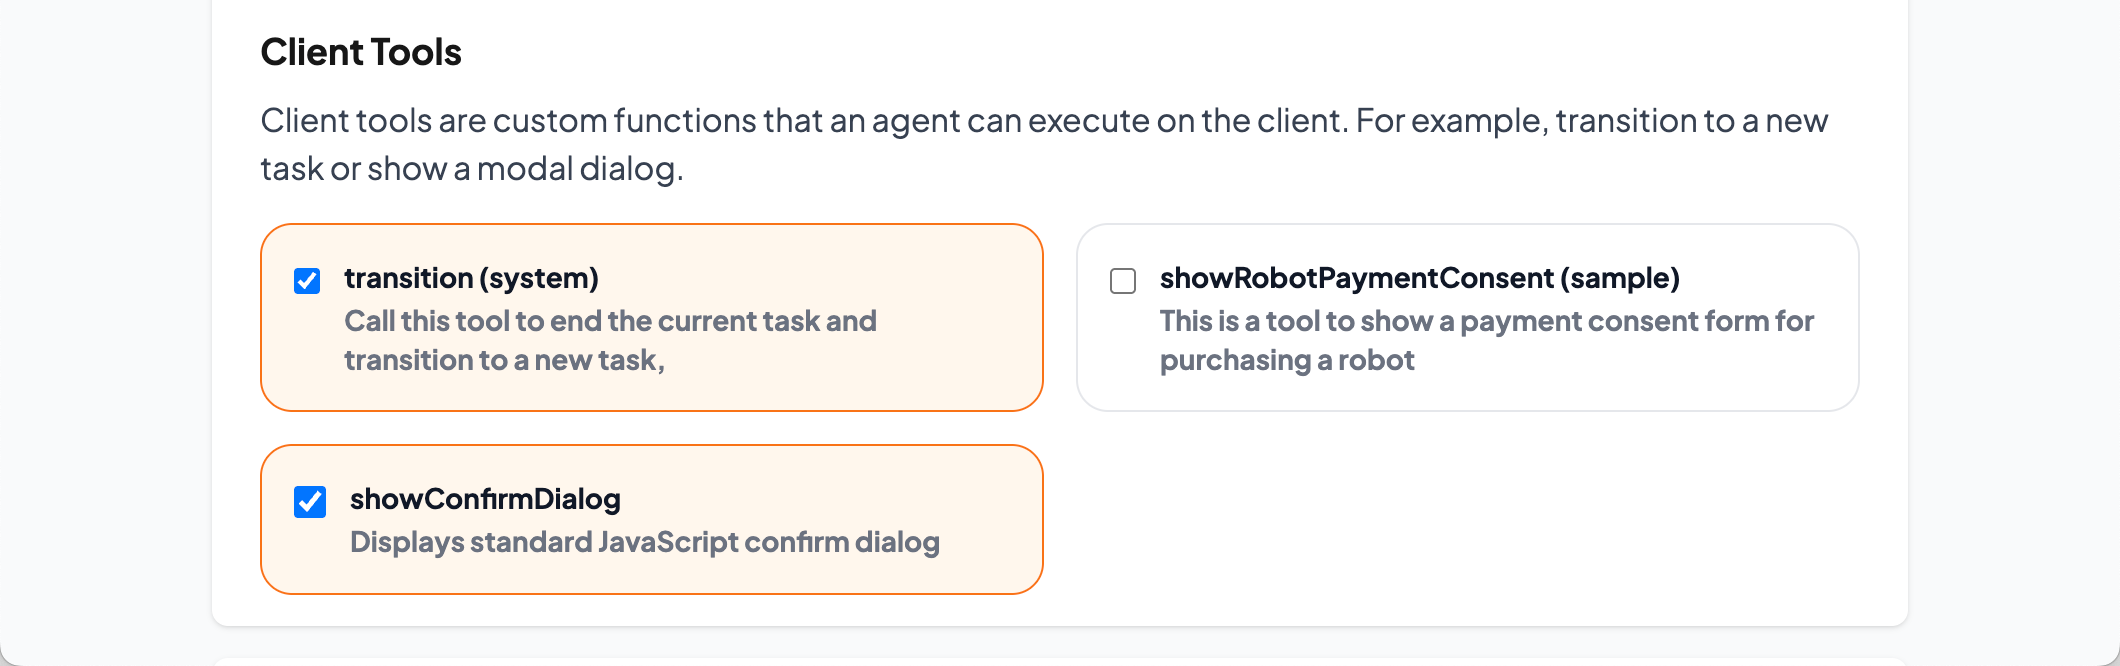 Figure 2: Enabling Client Tool.
Creating a Custom Context Tool
Context Tools automatically enrich every user interaction by providing additional contextual information. Examples include retrieving the current date and time, loading user-specific settings, or automatically fetching user data from a database.
The following example demonstrates creating a Context Tool named getCurrentTime to automatically provide the current time and timezone:
Step 1: Open the Context Tools file
Open the tools/context-tools.ts file.
Step 2: Register the Context Tool
Here’s a practical example to fetch the current time and timezone:
registerContextTool({
    name: 'getCurrentTime',
    description: 'Gets the current time and user timezone.',
    async function() {
        return `The current time is ${this.user.now.toLocaleString()} in the time zone ${this.user.timeZone}`;
    },
});
Explanation:
Context Tools:
- Are triggered automatically with each user message.
- Do not require input parameters.
Accessing Additional Context:
Use JavaScript this for context access:
export interface ContextToolContext {
  user: { id: string; now: Date; timeZone: string };
  agent: { id: string; name: string };
  messages: MessageAI[]; // Provides message history for enhanced context
  db: PrismaClient;
}
You can access this context data within a function with JavaScript’s this like here:
async function example() {
    const userMessages = this.messages;
    const userId = this.user.id;
    const agentId = this.agent.id;
}
Tool Availability:
Your Context Tool will appear in the Context Data section of the Edit Task page. Enabling it in the global task makes it universally available.
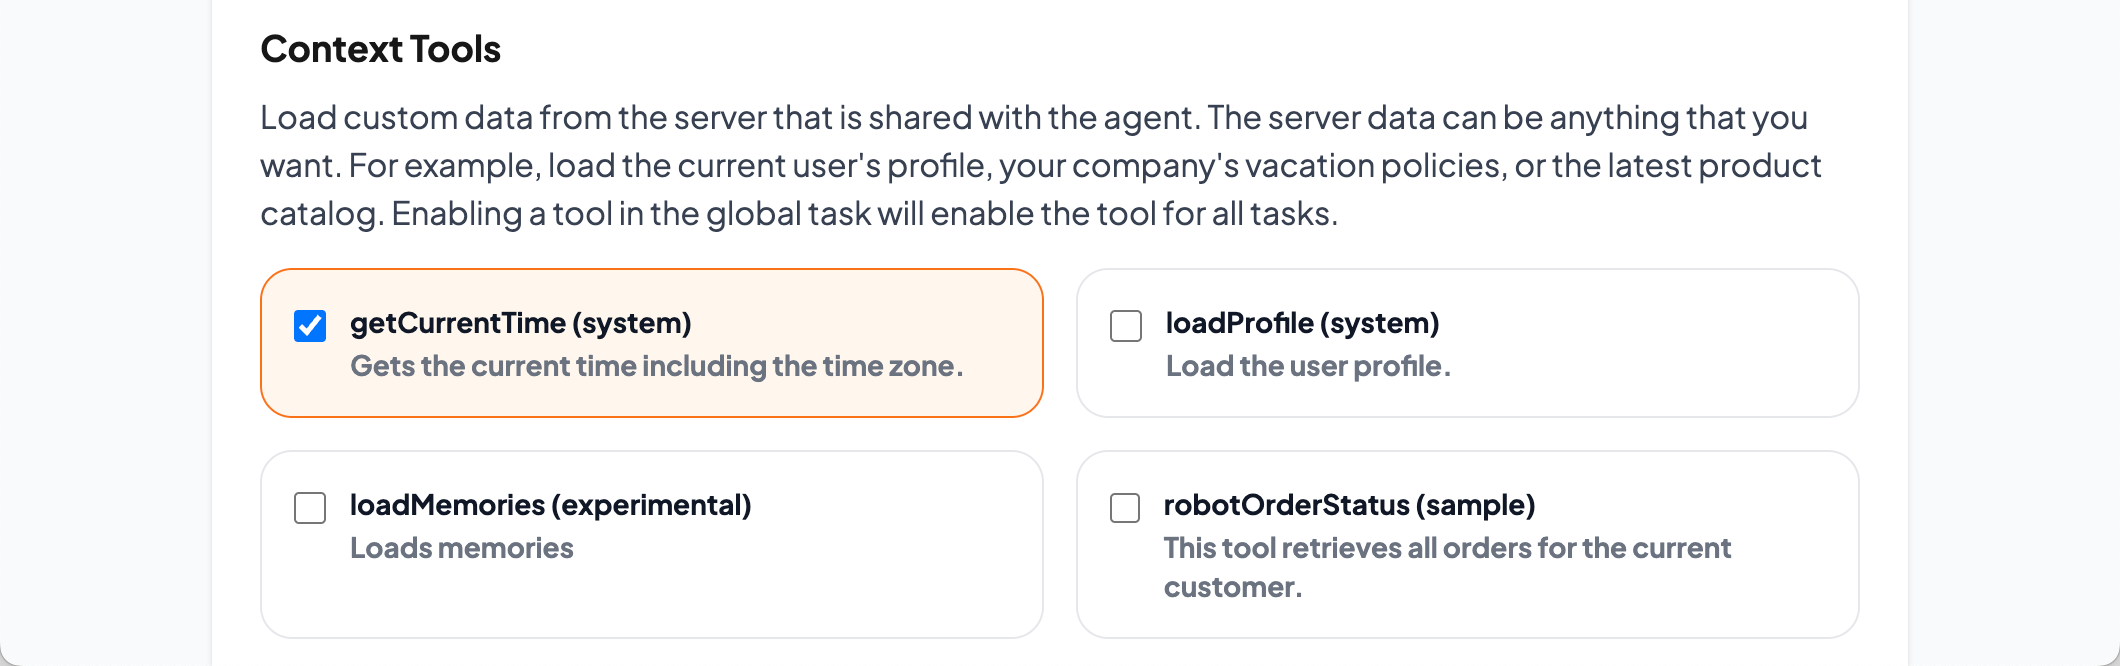 Figure 3: Enabling Context Tool.